Today smartphones contain our whole life, and email on Android is its integral attribute. With e-mail, we correspond, manage our accounts on different services, and get acquainted with mailing lists that help us to find out about interesting events and promotions. However, not everyone knows how to set up e-mail so that you won’t miss any important messages while deleting all unnecessary stuff. That’s what we’re going to talk about today.
Before we turn to the settings that will help simplify your e-mail interaction, let me remind you that our site has detailed instructions on how to make e-mail on your phone. If you’re a beginner, familiarize yourself with it first, then come back here for helpful tips.
How to set up email notifications
To make sure you don’t miss important emails, you need to enable email notifications. To do this, I recommend installing the email app on your phone. The first time you run it, the program will ask for permission to send notifications. If you forget to press the right button, do the following:
- Open your smartphone settings.
- Go to the “Apps” section.
- Select the mobile client of your email service.
- Activate notifications in the tab with the same name.
That way no email gets past you
If you use email in a browser, you need to turn on notifications specifically for your web browser. You also need to enable notifications in the service settings. In this case, you will receive not only emails, but also other notifications, which the browser likes to send so much.
Mail on your Android desktop
You can keep track of your incoming emails in another way, by installing a mail widget on your desktop. First, install the app of the service you use, then follow a few simple steps:
- Hold your finger on a free area of the home screen.
- Go to the “Widgets” section.
- Select the mail app window.
- Place the widget wherever you like.
Much more convenient with a widget
Your desktop mail will stay up to date, so you won’t miss a single important message. But keep in mind you need an Internet connection to keep your mail up to date.
How to set a signature in email
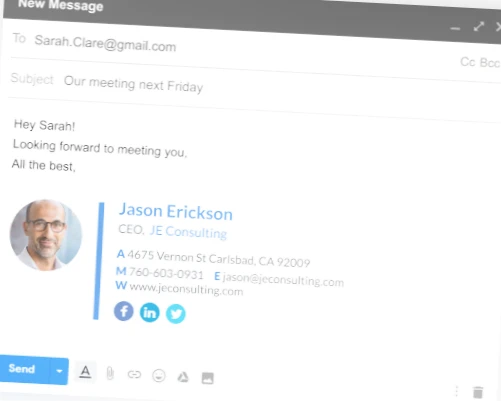
People who use e-mail to conduct business correspondence should definitely include an e-mail signature. Then the recipient will see not only the box address, but also your name along with contact information and other information you wish to leave:
- Open your email service settings through a separate app or browser.
- If you use more than one account, select the one you want.
- Open the Signature tab.
- Enter all the necessary information and click “Done“.
You can include your title and contact information in your signature
It’s done, and now it will be much easier for the recipient to contact you to clarify details and other information that you forgot to specify in the letter you sent.
How to unsubscribe from the mailing list
We all use e-mail, including for registration on sites. After you create an account, many resources automatically include a mailing list. Sometimes it is useful, but most often it causes only negative emotions. Fortunately, you have three ways to turn off mailing lists:
- There’s always a button at the end of the email that allows you to unsubscribe from incoming emails;
- You can also click the “Unsubscribe Mail” button after opening an email, by first opening the context menu by clicking on the “three dots”;
- Finally, in the menu of your email service should be a section “Manage newsletters”, through which you can unsubscribe from several services at once.
No more annoying ads!
By the way, you can restore deactivated mailing lists if you want. To do this, open the section for managing subscriptions and select the one that you accidentally or deliberately unsubscribed from, but now want to receive incoming mails again.
Automatic reply in the mail for vacation time
Few people know, but there is an auto-responder for mail. This is a useful feature offered by many services that will definitely come in handy for people with business correspondence. If you’re going on vacation and just can’t physically reply to an incoming email, take advantage of the option by doing the following:
- Open your email settings.
- Select your address.
- Go to the Autoresponder section.
- Specify when and under what circumstances an auto-response will work, as well as the contents of your message.
Use the auto-responder if you can’t write a letter yourself
This is how you set up Auto Responder in Gmail. If you use other boxes, the algorithm for enabling the option may also differ from the instructions above.

