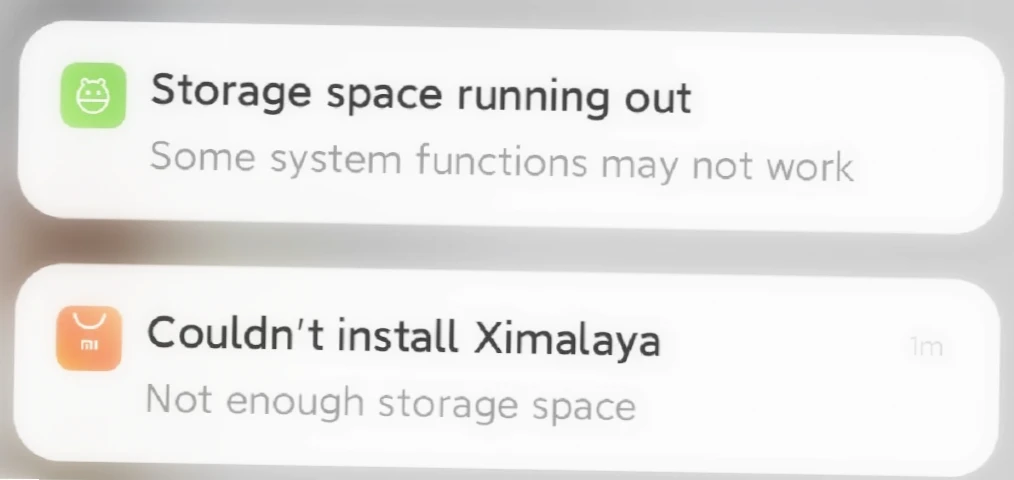
Symptoms indicating that your phone is running out of memory can vary. In some cases, it may be straightforward, like receiving a message stating “there is no free space, release the memory” when attempting to take a photo, or being unable to install a new application. Other times, the phone might simply start to slow down, and performance may become sluggish.
To identify if your cell phone has run out of space, there are a few signs to look out for:
- Insufficient Storage Messages: As mentioned earlier, if you encounter messages indicating low or no available space when trying to perform certain actions, it’s a clear indication that your phone’s memory is full.
- App Crashes or Errors: Running out of memory can cause apps to crash frequently or display errors due to inadequate space for their proper functioning.
- Sluggish Performance: When the device’s memory is almost full, the phone may slow down significantly, and you might experience delays when opening apps or navigating through the system.
- Inability to Download/Update Apps: If you can’t download new apps or update existing ones, it’s likely due to insufficient space on your device.
- Limited Photo/Video Storage: When the phone’s memory is running out, you may be unable to save new photos or videos.
Internal Storage

Internal Storage refers to the data storage on a smartphone that holds long-term data, including the operating system (OS), installed apps, photos, videos, documents, and other files. Typically, internal memory capacities come in 32GB, 64GB, 128GB, and on newer iPhones, it can go up to an impressive 1TB. For instance, a 1-minute 4K video consumes approximately 300MB of memory, while the same video in Full HD format uses around 100MB. On average, a single photo on a modern smartphone occupies about 5MB, meaning that 1GB can accommodate approximately 200 photos. Moreover, apps and games can take up 1GB or more of storage.
When your phone indicates insufficient memory, the problem is likely due to full internal storage.
How to See What Is Taking Up the Most Space
To identify what is consuming the most space on your Android phone’s internal memory, follow these steps:
- Open “Settings” on your Android device.
- Navigate to “About Phone” or “About Device.”
- Look for and select “Storage” or “Storage & Memory.”
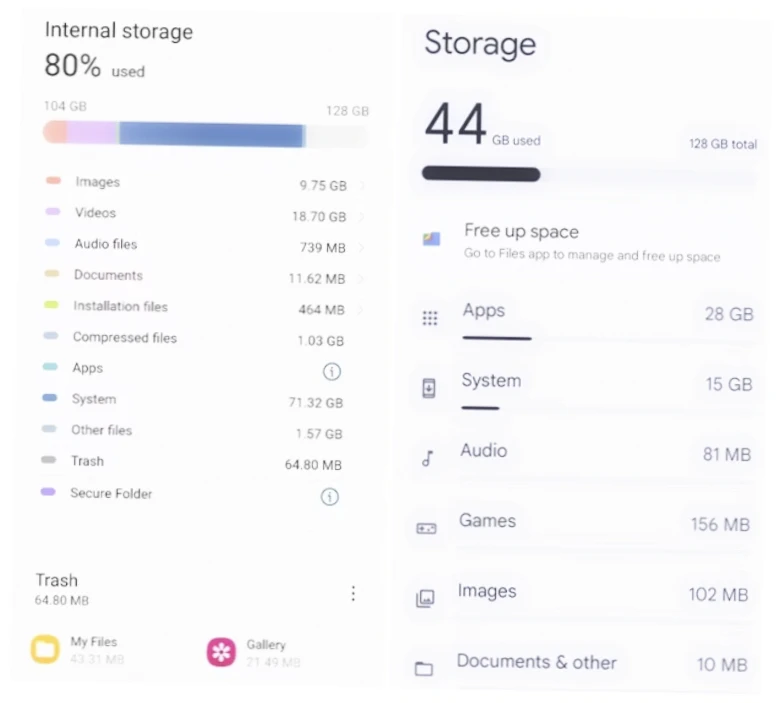
In this section, you will see a breakdown of the categories of data occupying your phone’s memory, including:
- Photos and Videos: Typically, user photos and videos consume a significant amount of storage space.
- Apps and Games: Installed applications and games can also take up considerable storage space.
By checking the storage breakdown, you can determine which data types are occupying the most space on your phone. Once identified, you can proceed to clean up or manage those specific categories to free up valuable storage and optimize your device’s performance.
Cleaning the Internal Memory of Android Devices
Cleaning the internal memory of Android devices is essential to maintain optimal performance. The methods for debris removal are typically free, but the specific options available may depend on the version of the operating system and the manufacturing company of the device. Here are some simple ways to clean the memory of your Android phone.
Delete Unnecessary Files and Applications
The easiest way, which does not require any additional knowledge or tools, is to let the system itself show you how your smartphone memory is occupied. To do this, go to the “Storage” or “Memory” section (the names of the menu items may vary depending on the shell and Android version). The phone will provide a color scheme indicating what is taking up memory.
Go through your photos, videos, music, documents, and other files, and delete anything you no longer need. This could include duplicate photos and unused apps. Additionally, on many smartphones, you may find photos, videos, or documents that you saved once but no longer need. Delete them or transfer them to the cloud, for example.
Once you finish the cleaning process, check if the deleted files are still in the Recycle Bin, and delete them from there as well.
Also, make sure to check the Downloads section – it may contain a large number of unused files, including heavy APK files.
Using Built-in Cleaning Utilities
Using built-in cleaning utilities is indeed one of the easiest ways to clean your phone’s memory and improve its performance. These utilities are designed to efficiently manage the device’s resources by closing unnecessary applications and clearing cache and temporary data. This process can potentially free up a significant amount of space, often around 3-4 GB, in the phone’s memory.
To access and initiate the built-in cleaning utility, follow these steps:
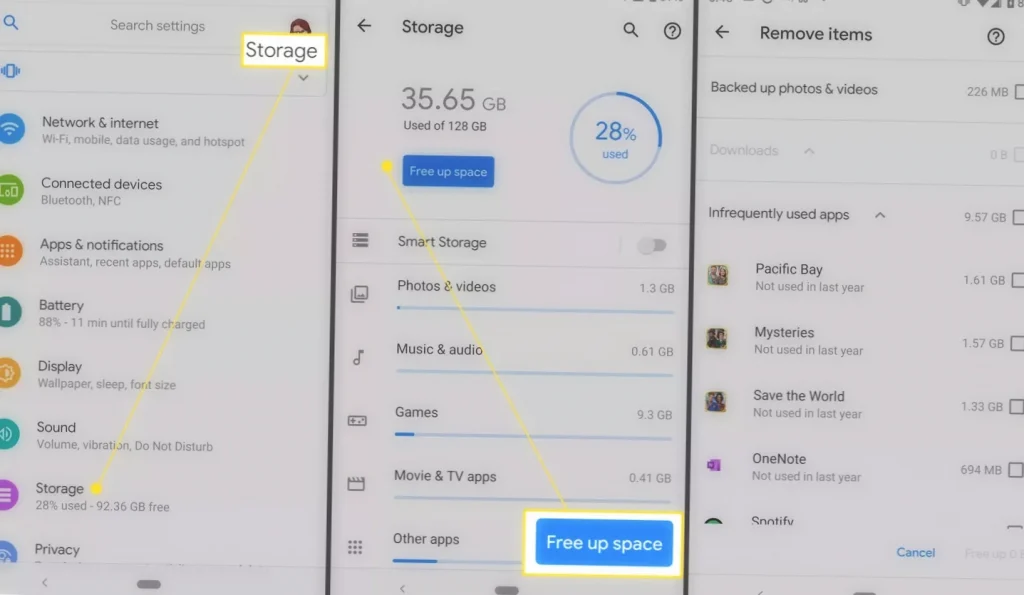
- Go to Phone Settings: Navigate to your phone’s settings, which can usually be found as an app icon on your home screen or in the app drawer.
- Find the Storage or Memory Section: Look for a section related to storage, memory, or device maintenance in your phone settings. The specific wording may vary depending on your phone’s make and model.
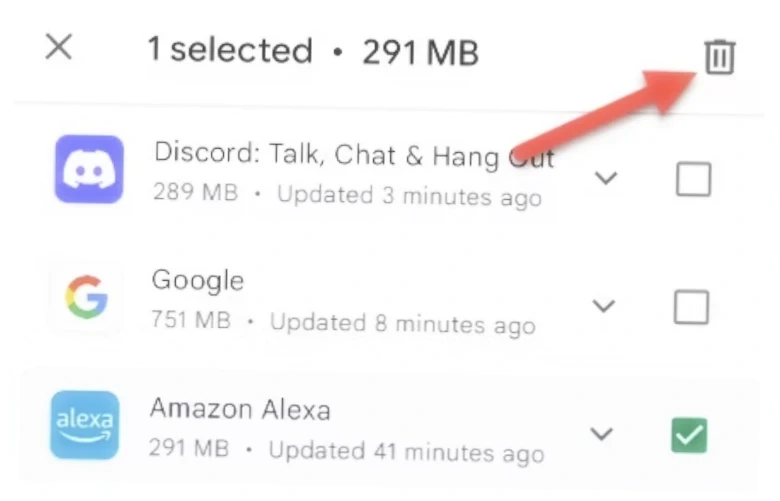
- Start the Cleaning Process: Within the storage or memory section, you should find an option to clean or optimize your phone’s memory. This could be labeled as “Clean Up” or “Free Up Space.”
- Follow the Prompts: Once you initiate the cleaning process, the utility will scan your phone for unnecessary data, cache, and background processes. It will then present you with a list of items that can be safely deleted or cleared.
- Confirm the Deletion: Review the list of items to be deleted and confirm the action. Be sure to double-check that you don’t delete anything you want to keep.
- Wait for the Cleanup to Complete: The utility will then proceed to clean the selected items, which may take a few moments depending on the amount of data to be cleared.
After the cleaning process is complete, you should notice an improvement in your phone’s performance, and more available space in the memory.
It’s important to note that while built-in cleaning utilities can be effective, they may not always be as thorough as some third-party cleaning apps. If you find that your phone still has significant memory issues or performance problems after using the built-in utility, you might consider exploring other cleaning apps from reputable sources, as long as you’re cautious about the apps you install to avoid potential malware or security risks.
Cleaning the Browser and Application Cache
Cache is a collection of temporary files stored by various applications, including browsers and games, with the primary purpose of speeding up data retrieval and improving the overall performance of programs and web pages. However, when the cache becomes filled with excessive data, it can have the opposite effect and slow down the device significantly.
Clearing Browser Cache
If you choose to clear the cache selectively, it’s essential to pay special attention to your browser, as it can accumulate a significant amount of data from your internet activities, including visits to websites and downloads. Clearing the browser cache can help free up valuable space on your smartphone.
If you are using the native Android browser, which is usually Chrome, you can follow these steps to clear its cache:
- Launch Chrome: Locate the Chrome app on your phone’s home screen or app drawer and open it.
- Open the “Settings” Section: Look for the three-dot icon located in the upper right corner of the Chrome application. Tap on it to access the settings menu.
- Go to the “History” Section: Within the settings menu, you should find a section labeled “History.” Tap on it to proceed.
- Select “Clear Browsing Data”: In the “History” section, you will see an option called “Clear browsing data.” Tap on it to start the clearing process.
- Choose Items to Clear: You will be presented with a list of items that can be cleared. It’s best to select “Browsing history,” “Downloads,” and “Cached images and files” to clear the cache effectively. However, be cautious not to select “Passwords” or “Login data” to avoid logging out of your accounts and losing saved passwords.
- Confirm the Clearing Process: After selecting the items you want to clear, confirm the action to proceed with clearing the browser cache.
Once the clearing process is complete, the cache data from your Chrome browser will be removed, and this should free up some memory on your smartphone.
It’s worth noting that clearing the cache may result in slightly slower loading times for websites on your browser initially, as it will need to re-download certain data. However, this will improve over time as you visit websites and the cache gets re-populated.
Clearing Application Cache
- Open the settings on your device.
- Find and select the “Applications” or “Apps” section.
- In this section, you can see a list of all installed applications.
- To sort the list by size, tap on “Sort” or “Storage usage” and select “Sort by size.”
- Open each application one by one from the list.
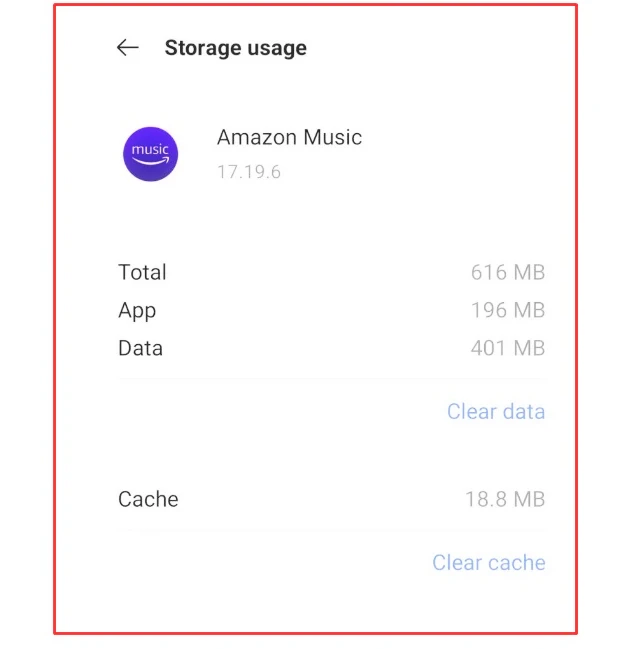
- Inside the application’s details, tap on “Storage.”
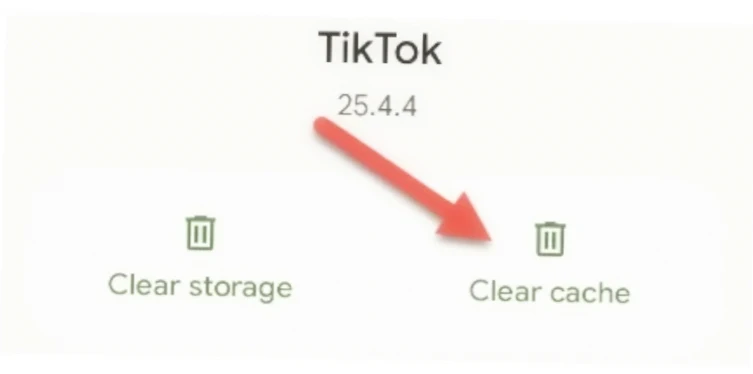
- You’ll see options like “Clear cache”.
- Tap on “Clear cache” to remove the cached data for that particular app. Be cautious about tapping “Clear data” as it will delete all app data, including login credentials and personalized settings.
By following these steps, you can clear the cache of both your web browser and installed applications, freeing up valuable space on your device and potentially resolving performance issues.
Cleaning with Third-Party Applications
Cleaning with third-party applications can be a convenient and efficient way to free up space on your Android device. These applications are designed to help you uninstall unnecessary programs and perform various cleaning tasks automatically. They are compatible with different versions of the operating system and offer a user-friendly experience. Here’s how you can use third-party cleaning apps to clean your Android device.
Clean Master
Clean Master is a widely-used utility that aims to optimize device performance and enhance security. It is designed to clean the memory of smartphones by clearing cache and removing unnecessary information.
The main functions of Clean Master include:
- Cleaning the Phone: Users can select and remove files to free up storage space.
- Phone Accelerator: Cleans the RAM to improve device performance and offers a speed test to confirm acceleration.
- Battery Saver: Monitors background app power consumption to extend the device’s battery life.
Android Assistant
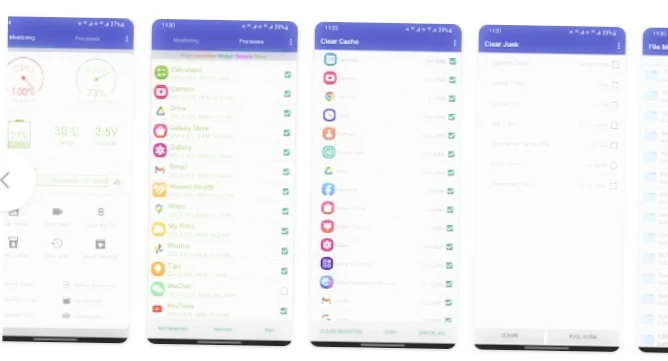
Android Assistant is a highly-ranked utility on the Google Play Market, offering a wide range of features, including:
- System Analysis: Regularly analyzes the operating system and provides a report on memory status, system load, and battery temperature.
- Startup Apps Manager: Allows users to view and control the list of programs that automatically launch when the device is turned on.
- Process Manager: Enables easy management of running applications with just two taps on the screen.
- Memory Cleaning: Cleans the memory of your tablet or phone with a single button press, freeing up valuable storage space.
- File Transfer: Includes a function that facilitates quick file transfer between external and internal storage disks.
Transferring Some Data to the External Memory Card
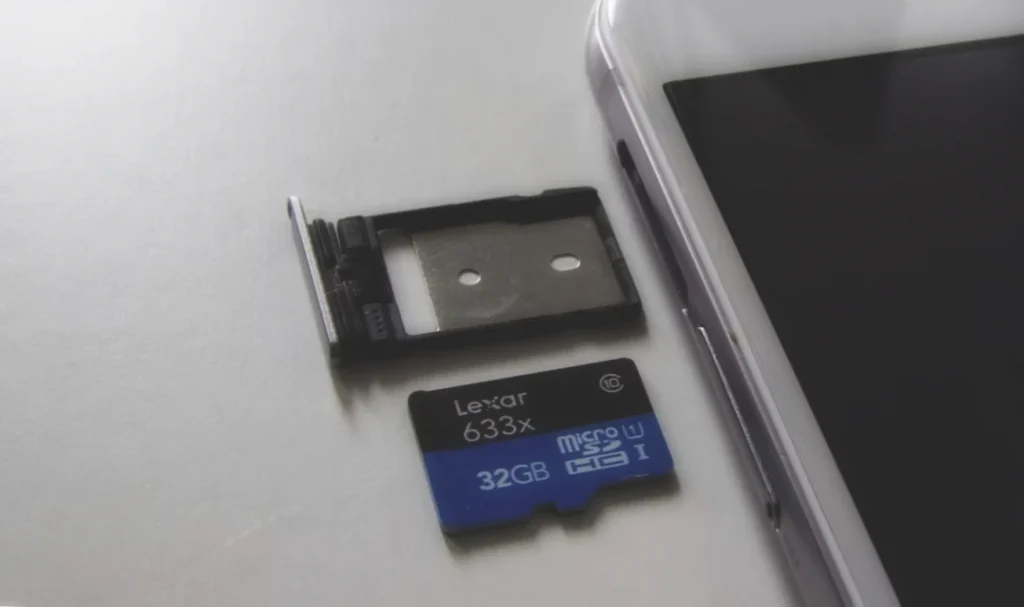
To clean up your phone’s memory and free up space, you can transfer certain files and apps to external storage, such as an SD card. This will be especially useful for files like e-books, photos, and videos, which do not affect the device’s working condition. To facilitate the transfer process, you can use a File Manager application. Follow these steps to transfer files and apps to external storage:
Transferring Files
- Open the File Manager application on your phone.
- Navigate to the internal memory of the device where the files you want to transfer are located.
- Long-press your finger on the file you wish to move for about two seconds.
- Tap on the “Scissors” icon or the “Cut” option to initiate the file transfer action.
- Now, navigate to the MicroSD card (external storage).
- Press the “Insert” button or choose the “Paste” option to move the file to the external storage.
- Repeat these steps for each file you want to transfer.
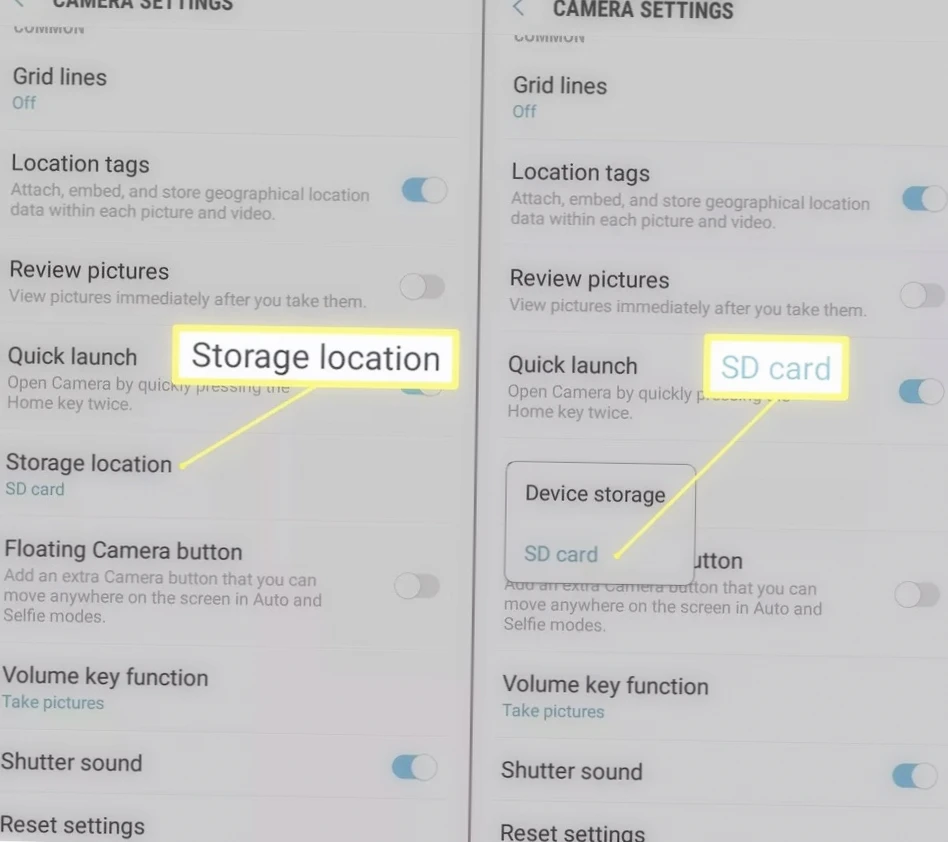
Transferring Apps
- Open the “Settings” section on your device.
- Go to the “Memory” or “Storage” subsection.
- Look for an option related to “MicroSD” or “SD Card.”
- Check the box or enable the option that allows apps to be installed on the external storage (MicroSD card).
- Reboot your device to apply the changes.
After completing these steps, any new programs and applications you install will be saved on the external storage device, which helps to free up space in the internal memory.
Transferring Files to Your Computer
Cleaning your Android device by transferring files to your computer is a convenient option. To achieve this, follow these steps:
- Connect via USB Cable:
- Use a USB cable to connect your Android device to your computer.
- Wait for the automatic installation of drivers, which may take a moment.
- Open File Explorer:
- On your computer, open “Explorer” (Windows) or “Finder” (Mac) to access your file system.
- Access Phone Files:
- In the file explorer, locate and select your connected Android device.
- Navigate to the files on your phone that you want to transfer to your computer.
- Cut and Transfer Files:
- Select the user-defined files you wish to move from your Android device to your computer.
- Right-click on the selected files and choose “Cut” or “Copy.”
- Navigate to the desired location on your computer’s storage.
- Right-click on the empty space in the destination folder and choose “Paste” to transfer the files from your Android device to your computer.
By following these steps, you can efficiently transfer specific files from your Android device to your computer, freeing up space on your phone and ensuring important data is safely stored on your computer’s external storage.
Transferring Files to Cloud Storage
Transferring files to cloud storage is an excellent way to expand the capabilities of your Android device and free up memory. Here’s how you can clean the memory of your device by using cloud storage:
cloud storage is indeed a convenient and effective way to clear up your phone’s memory and ensure that your important files are safely stored and accessible across different devices. Here are some popular cloud storage options along with their features:
Google Drive
As the native cloud storage option for Android smartphones, Google Drive offers 15 GB of free storage space. You can easily set up automatic file transfers from your phone, organize and sort files, and benefit from Google’s AI-powered object recognition in photos. If you require more storage, Google provides various paid plans, such as 100 GB for $1.99 per month and 2 TB for $9.99 per month, along with additional bonuses.
OneDrive
Microsoft’s cloud service, OneDrive, offers 5 GB of free storage space. However, you can opt for a subscription, which provides 1 TB of space for $69.99 per year in the personal plan, or 6 TB for $99.99 per year in the family plan, which includes access for 6 people and license keys for MS Office.
Dropbox
Dropbox starts with 2 GB of free space, and like Google Drive, it supports various file types, making it a versatile option. The official app ensures convenient file management. For those who require more space, they offer a 2 TB plan for $9.99 per month, a family plan for $16.99 per month, and a professional plan for $24.99 per month, but these may be more suitable for business use.
When considering a cloud storage service, it’s essential to assess your storage needs and choose a plan that fits your requirements best. With cloud storage, you can securely store your files, declutter your phone’s memory, and have easy access to your data from various devices whenever you need it.
Important Note:
- Before deleting files from your device, ensure that the files have been successfully uploaded to the cloud storage.
- Familiarize yourself with the terms and conditions of the cloud storage service regarding data storage limits, file retention policies, and any other restrictions that may apply.
Video Instruction
Conclution
By following these meticulously crafted techniques, you’ll achieve optimal storage utilization on your Android phone while enhancing its overall performance. Regularly monitor and manage your storage space to prevent unnecessary clutter, ensuring your device remains swift and efficient for all your digital pursuits.
Here are some tips to avoid storage capacity issues and maintain your smartphone’s performance:
- Download only necessary applications to prevent unnecessary storage consumption.
- Avoid purchasing third-party programs that promise performance improvements, as they may have the opposite effect.
- Regularly transfer video and photo materials to external storage, a computer, or cloud services to free up memory and enhance device performance.
- Consider adding an SD card if your device supports it, as it can significantly increase available storage space.
- Keep sufficient free memory, as the performance of your smartphone depends on it, and cluttered memory can lead to decreased performance.
By following these tips, you can ensure that your smartphone’s storage remains sufficient, and your device maintains optimal performance.