Why Mirror Your Android Device to Your TV?
There are many benefits to mirroring your Android device to your TV, making it an increasingly popular option for people who want to enjoy their media on a larger screen, play mobile games, share presentations, photos, and videos with friends and family, and even transform their TV into a smart display for their Android device.
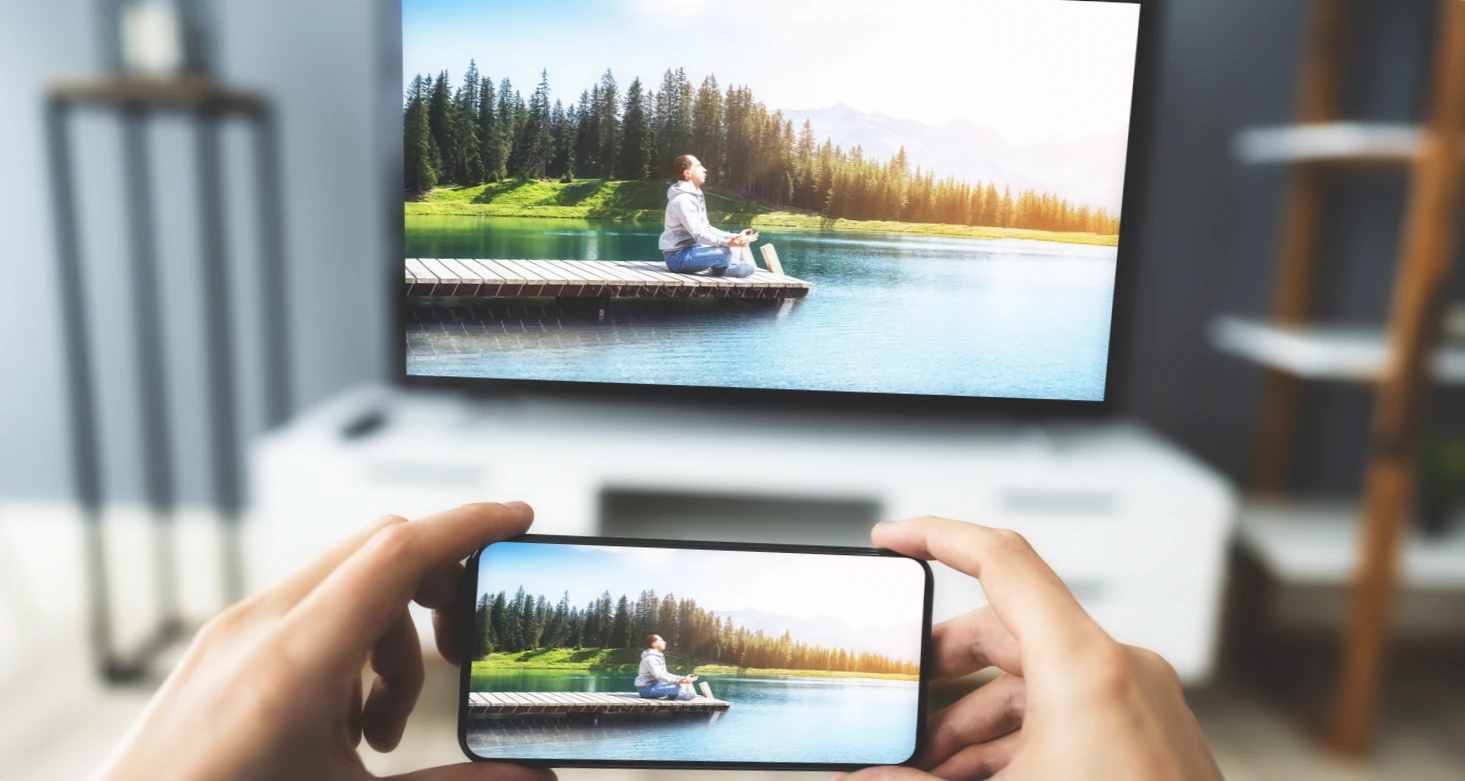
Enjoy Media on a Bigger Screen
One of the biggest benefits of mirroring your Android device to your TV is the ability to enjoy your media on a much larger screen. Whether you’re watching movies, TV shows, or streaming services, mirroring your Android device to your TV provides a more immersive viewing experience.
Play Mobile Games on Your TV
Another benefit of mirroring your Android device to your TV is the ability to play mobile games on a larger screen. This provides a more immersive gaming experience, especially for games that require multiple players.
Share Presentations, Photos, and Videos with Friends and Family
Mirroring your Android device to your TV also makes it easy to share presentations, photos, and videos with friends and family on a larger screen. This is especially useful for work presentations, family gatherings, and other social events.
Transform Your TV into a Smart Display for Your Android Device
Finally, mirroring your Android device to your TV can transform your TV into a smart display for your Android device. This allows you to access your Android device’s apps, games, and media on your TV without the need for a separate smart TV.
Prerequisites: What You Need for Successful Screen Mirroring
Screen mirroring is a great way to display your Android device’s screen on a larger display, such as a TV or monitor. However, before you can start mirroring your device, there are a few prerequisites you need to meet. Here are the key requirements for successful screen mirroring:
Android Device with Screen Mirroring Capability
First and foremost, you need an Android device with screen mirroring capability. Most modern Android devices have this feature built-in, but you’ll need to check your device’s specifications to confirm that it supports screen mirroring.
Compatible TV or Display
Next, you need a compatible TV or display that supports screen mirroring. There are several different technologies that can be used for screen mirroring, including HDMI, MHL, SlimPort, Chromecast, Miracast, and Samsung Smart View. Make sure that your TV or display supports the same technology as your Android device.
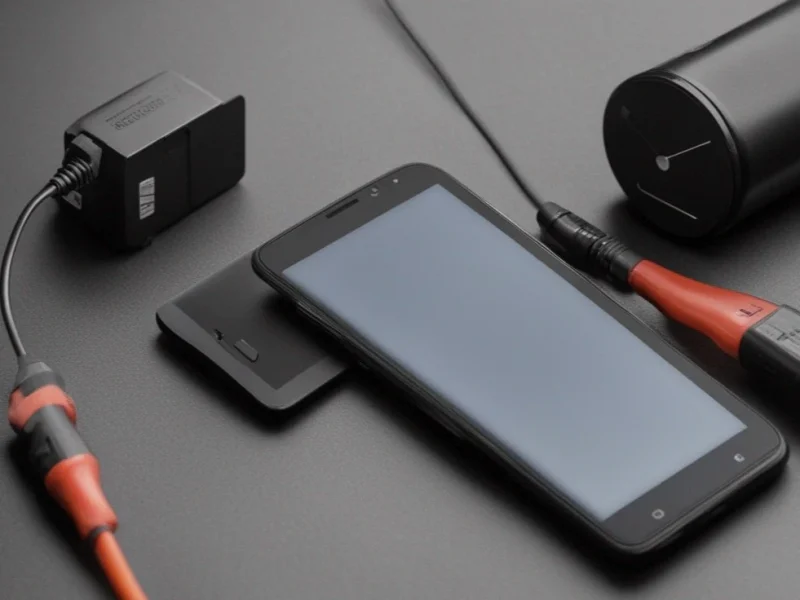
Necessary Cables or Adapters
If you’re using a wired solution for screen mirroring, you’ll need the necessary cables or adapters to connect your Android device to your TV or display. For example, if you’re using an HDMI connection, you’ll need an HDMI cable and an adapter that’s compatible with your Android device.
Before you can start screen mirroring your Android device, you need to make sure that you have an Android device with screen mirroring capability, a compatible TV or display, and the necessary cables or adapters (if using a wired solution). By meeting these prerequisites, you’ll be able to enjoy your Android device’s screen on a larger display with ease.
Wired Solutions
How to Connect an Android Phone to Your TV via USB
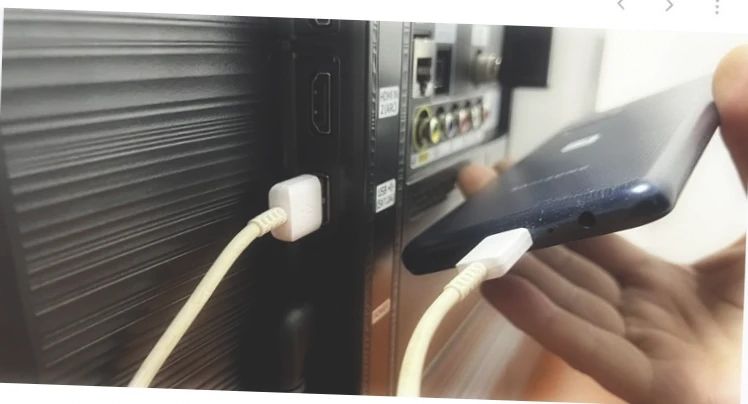
Connecting your Android phone to your TV via USB is a simple and convenient way to display your phone’s media files on a larger screen. In this post, we’ll guide you through the steps to connect your Android phone to your TV via USB.
Which TV Will Work: Any TV with a USB Port
The great news is that any TV with a USB port will work. This means that you don’t need a smart TV or any additional hardware to connect your Android phone to your TV.
What Else You Need: A USB Cable
To connect your Android phone to your TV via USB, you’ll need a USB cable. This cable should be compatible with both your phone and your TV.
How to Connect an Android Phone to Your TV via USB:
- Connect your TV to your phone with a USB cable.
- Select the USB port on the TV as the signal source (Source).
- If necessary, confirm the connection mode on your phone.
- On the TV screen, you’ll see the folder structure or the list of files that the TV has scanned and recognized. The files you see will depend on the model of your phone.
- Use the remote control to navigate and browse the files.
While connecting your Android phone to your TV via USB is an easy and convenient way to display media files on a larger screen, it does have some limitations. You will only be able to play media files stored in your phone’s memory, such as photos, videos, and audio. Apps and games, for example, cannot be displayed on the TV through this method.
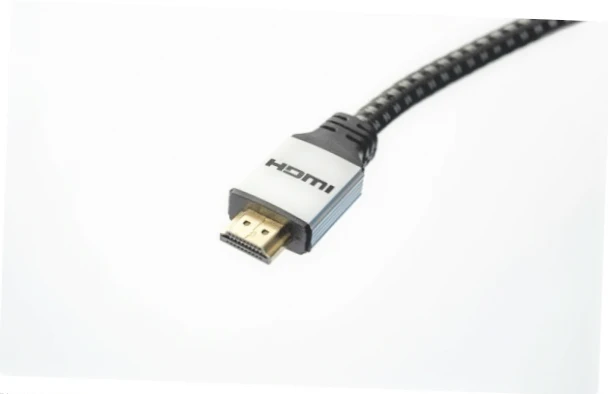
How to Connect Your Android Device to Your TV with HDMI
Pros: This method provides a fast connection, and it works on all TVs.
Cons: of Connecting Your Smartphone to Your TV with HDMI
This method requires a suitable cable, and it is not a wireless connection.
What You Need:
To connect your smartphone to your TV with HDMI, you’ll need a suitable cord: HDMI to Type-C, HDMI to microUSB depending on the connector in your smartphone.
How to Connect Your Smartphone to Your TV with HDMI
- Insert one end of the HDMI cable into your smartphone, and the other end into the TV.
- In the TV settings, select the signal source. This will be one of the HDMI ports.
- The synchronization of the phone with the TV will begin.
- In a minute, the connection will be completed. The image on the TV will be automatically adjusted to the correct size.
After successfully connecting the two devices, the picture from the phone display will be duplicated on the TV screen. With this method, you can connect your smartphone to the TV to watch movies or clips from YouTube, rungames, use mobile applications, and much more.
While connecting your smartphone to your TV with HDMI is a great way to display your phone’s screen on a larger screen, it does have some limitations. For example, you need to have a compatible HDMI cable, and the connection is not wireless.
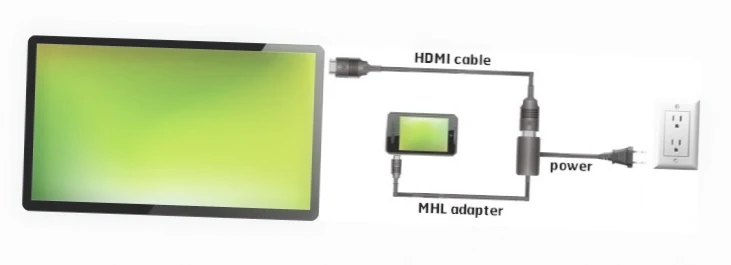
How to Connect Your Android Device to Your TV via MHL
MHL (Mobile High-Definition Link) is a standard that allows you to use your phone’s microUSB connector as an HDMI port for picture transmission. In this post, we’ll guide you through the steps to connect your Android device to your TV via MHL.
Check if Your Android Device Supports MHL
The first step is to confirm if your Android device supports MHL. Samsung and Sony Xperia models most often have it. To find out if your device supports MHL, use the MHL Checker.
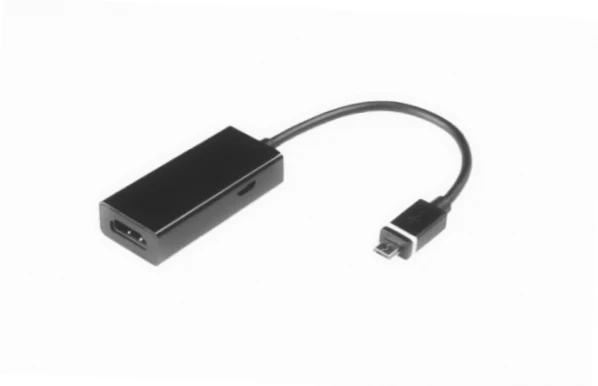
Connect Your Device via a Special Adapter
Once you’ve confirmed that your Android device supports MHL, connect your device to your TV using a special adapter. Connect one end of the cable to the TV, the other end to the adapter, and then connect the adapter to your smartphone.
Enjoy Your Android Device’s Screen on Your TV
After connecting your device, the image from your phone’s screen will appear on the TV screen. You can now enjoy your Android device’s screen on a larger display.
Connecting your Android device to your TV via MHL is a convenient way to display your phone’s screen on a larger screen. All you need is a compatible MHL adapter, and a TV with an HDMI port.
With these steps, you’ll be able to connect your Android device to your TV via MHL in no time. Keep in mind that not all Android devices support MHL, so besure to check before purchasing an MHL adapter.
Wireless Solutions
How to Connect Your Android Phone to Your TV via Wi-Fi Direct
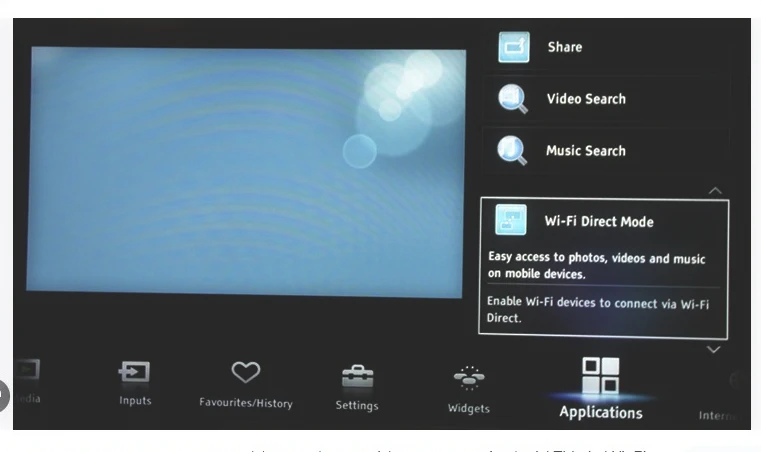
Connecting your Android phone to your TV via Wi-Fi Direct is a wireless way to display your phone’s screen on a larger display. In this post, we’ll guide you through the steps to connect your Android phone to your TV via Wi-Fi Direct.
Which TV Will Work: A Wi-Fi Direct-Enabled TV
To use Wi-Fi Direct, you’ll need a Wi-Fi Direct-enabled TV. Most modern TVs are equipped with this feature, but it’s best to check your TV’s manual or specifications to confirm.
What You’ll Need: Nothing
One of the great things about Wi-Fi Direct is that you don’t need any additional hardware or cables. All you need is your Android phone and a Wi-Fi Direct-enabled TV.
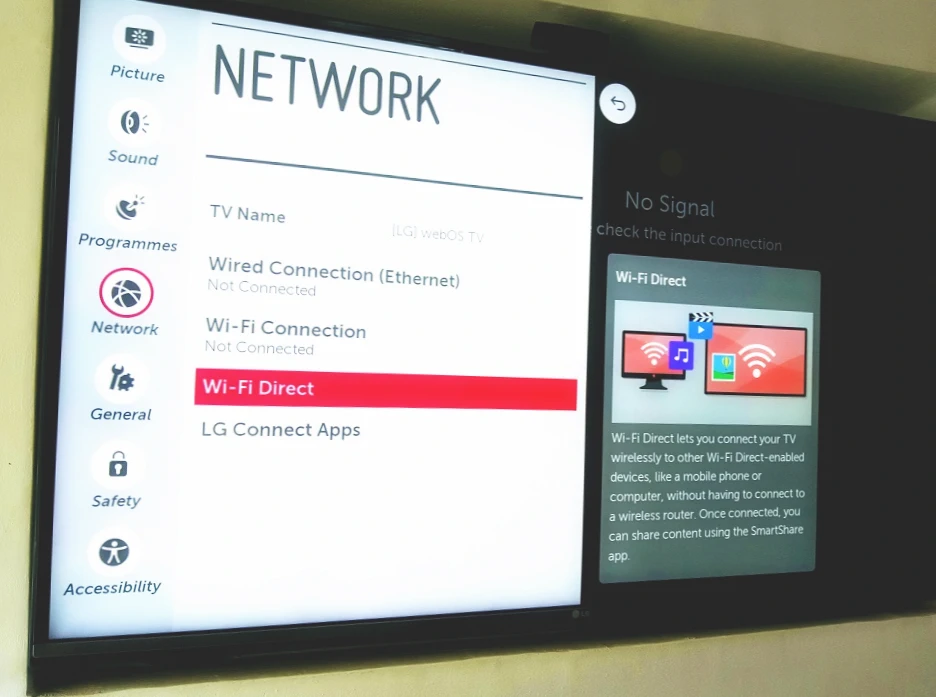
How to Connect Your Android Phone to Your TV via Wi-Fi Direct
- Open the network settings on your TV and turn on Wi-Fi Direct.
- On your Android phone, go to Settings → Wireless Networks → Wi-Fi → Wi-Fi Direct.
- After scanning the available devices, select your TV.
- Use the “Send” menu on your smartphone to send photos, videos, and audio to the TV.
After successfully connecting the two devices, you can use your smartphone to send media files to the TV using the standard “Send” menu. With this method, you can connect your Android phone to the TV to watch movies or clips from YouTube, run games, usemobile applications, and much more.
How to Connect Your Android Phone to Your TV via DLNA
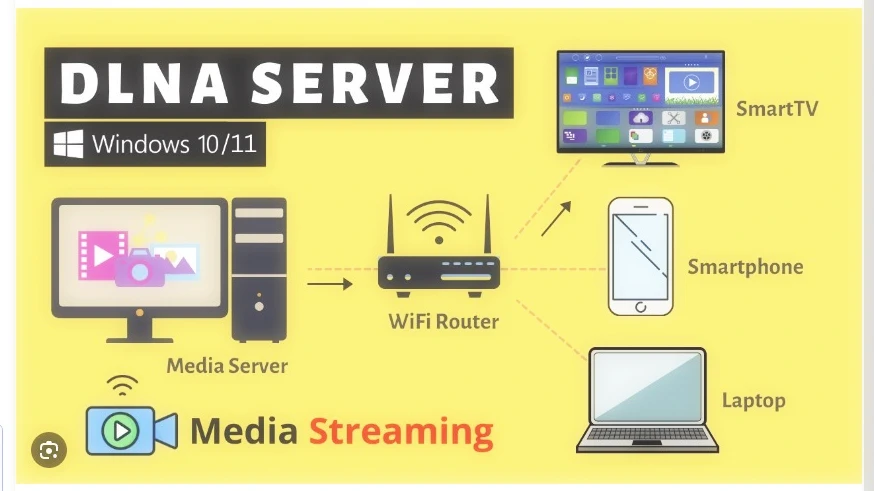
Connecting your Android phone to your TV via DLNA is a convenient way to display your phone’s media files on a larger display. In this post, we’ll guide you through the steps to connect your Android phone to your TV via DLNA.
Which TV Will Work: Any TV with DLNA Support
Most modern TVs have DLNA support, but it’s best to check your TV’s manual or specifications to confirm.
What You’ll Need: Nothing
To use DLNA, you don’t need any additional hardware or cables. All you need is your Android phone and a TV with DLNA support.
How to Connect Your Android Phone to Your TV via DLNA
- Make sure your TV and smartphone are connected to the same network.
- Activate the DLNA function in your TV settings.
- Launch the standard Android gallery and open the desired media file.
- Go to “Menu” → “Select Player” and click on the name of your TV in the list.
After successfully connecting the two devices, you can view media files from your Android phone’s memory on the TV’s larger display.
For advanced settings and streaming files from other programs, you can install a media server app from Google Play, such as the popular BubbleUPnP.
How to Connect Your Android Phone to Your TV via Miracast
Connecting your Android phone to your TV via Miracast is a wireless way to display your phone’s screen on a larger display. In this post, we’ll guide you through the steps to connect your Android phone to your TV via Miracast.
Which TV Will Work: Any TV with Miracast Support
Most modern TVs have Miracast support, but it’s best to check your TV’s manual or specifications to confirm.
What You’ll Need: Nothing or a Special Adapter
If your TV has Miracast support, you don’t need any additional hardware or cables. Otherwise, you’ll need a special adapter that supports Miracast.
How to Connect Your Android Phone to Your TV via Miracast
If You Have a Smart TV:
- Open the network settings on your TV and turn on Miracast.
- On your smartphone, go to Settings → Screen → Wireless Monitor and turn on the feature.
- Select the TV in the list of found Miracast devices.
- The image from your smartphone will appear on the TV screen as soon as it is connected.
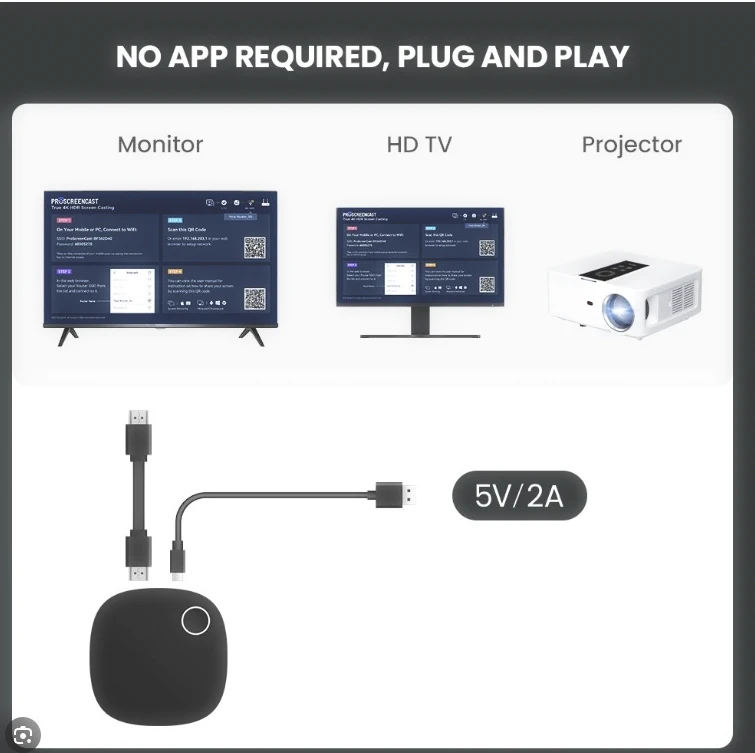
If You Need an Adapter:
- Purchase a compatible adapter. Preferably, choose universal models that support Miracast, Chromecast, and AirPlay.
- Plug the adapter into the HDMI port on your TV. If necessary, use a USB cable to connect power to the adapter.
- Select the HDMI connector on your TV to which the adapter is connected.
- Download the app from the QR code on the screen and connect through it. Alternatively, use the standard Android function by activating it in the menu “Settings” → “Screen” → “Wireless Monitor”.
After successfully connecting the two devices, the image from your smartphone will appear on the TV screen. With this method, you can connect your Android phone to the TV to watch movies or clips from YouTube, run games, use mobile applications, and much more.
How to Connect Your Android Phone to Your TV via Chromecast

Connecting your Android phone to your TV via Chromecast is a wireless way to display your phone’s screen on a larger display. In this post, we’ll guide you through the steps to connect your Android phone to your TV via Chromecast.
Which TV Will Work: Any TV
Chromecast can be connected to any TV with an HDMI port.
What You’ll Need: A Chromecast Set-Top Box
To use Chromecast, you’ll need to purchase a Chromecast set-top box.
How to Connect Your Android Phone to Your TV via Chromecast
- Buy a Google Chromecast.
- Plug the Chromecast set-top box into your TV’s HDMI connector and plug in the USB cable for power.
- Switch to the Chromecast set-top box’s HDMI port and connect it to your Wi-Fi network.
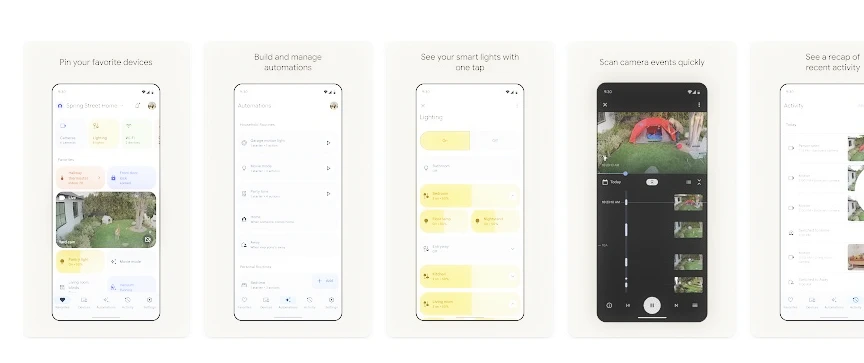
- Download the Google Home app for Android or iOS to your smartphone.
- Open the app and perform the initial setup by logging in with your Google account.
- Launch the content in a compatible app, tap the broadcast icon, and select the Chromecast device from the list.
After successfully connecting the two devices, the image from your smartphone will appear on the TV screen. With this method, you can connect your Android phone to the TV to watch movies or clips from YouTube, run games, use mobile applications, and much more.
Limitations of Connecting Your Android Phone to YourTV via Chromecast:
You need to purchase a Chromecast set-top box to use this method, and it may not be compatible with all apps.
How to Mirror Android to TV via Native Android mirroring
To mirror your Android device to a TV via native Android mirroring, you can follow the steps below:
- Ensure that your Android device and your TV are both compatible with native Android mirroring. Most modern Android devices and smart TVs support this feature, but it’s always best to check the manufacturer’s website or user manual to confirm.
- Connect your Android device and TV to the same Wi-Fi network.
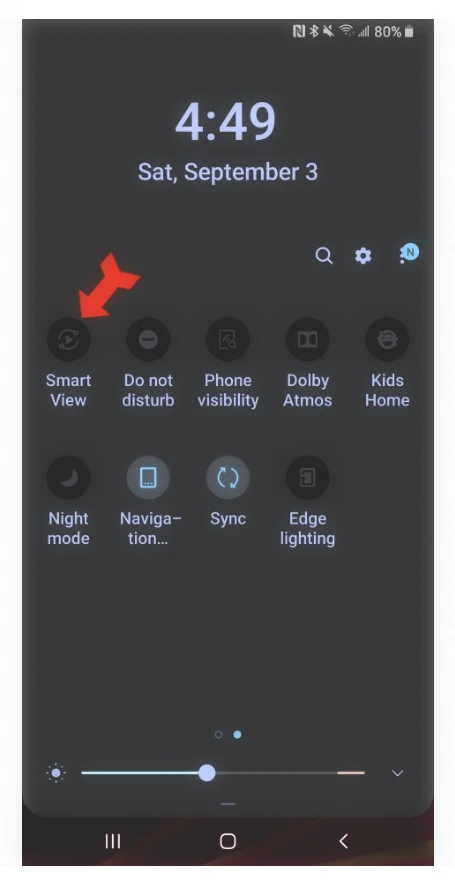
- On your Android device, swipe down from the top of the screen to access the notification shade.
- Look for the “Cast” or “Screen Mirroring” icon and tap on it. The icon may look different depending on your device, but it should be easy to identify.
- Select your TV from the list of available devices. If your TV is not listed, ensure that it is compatible with native Android mirroring and that it is connected to the same Wi-Fi network as your Android device.
- Once you have selected your TV, your Android device screen should be mirrored on your TV. You can control the playback and navigate your device using your Android device as a remote.
Note: Some Android devices may have slightly different steps to access native mirroring, but the general process should be similar. Additionally, some TVs may require specific settings or configurations to be enabled for native mirroring to work properly.
Choosing the Best Connection Method for Your Smartphone and TV
When it comes to connecting your smartphone to your TV, there are several methods to choose from. Here’s a breakdown of the most common options and how to choose the best one for your needs.
Obsolete Methods: USB, DLNA, and Wi-Fi Direct.
While USB, DLNA, and Wi-Fi Direct were once popular connection methods, they are now considered outdated. However, they can still be used as alternatives if needed.
Modern Methods: HDMI, Miracast, Chromecast.
The most relevant and up-to-date connection methods are HDMI, Miracast, Chromecast, and AirPlay.
- HDMI: This is a popular wired connection method that supports high-quality audio and video. If your smartphone and TV both have HDMI ports, this is a reliable option.
- Miracast: This wireless method allows you to mirror your smartphone’s screen onto your TV. If you have an Android smartphone and a Smart TV, you can easily connect via Miracast. If your TV is not Smart, you can buy a Miracast adapter.
- Chromecast: This wireless method is similar to Miracast, but requires a Google Chromecast set-top box. It allows you to stream content from your smartphone to your TV and supports Full HD and 4K resolution.
How to stop casting your Android phone to a TV
To stop casting your Android phone to a TV, you can follow the steps below:
- Open the app that you are currently casting from on your Android device.
- Look for the “Cast” icon in the app’s navigation bar or control panel. The icon may look different depending on the app, but it should be easy to identify.
- Tap on the “Cast” icon to bring up the list of available devices that you can cast to.
- Look for the device that you are currently casting to and tap on it. When you tap on it, the casting icon should disappear from the app’s navigation bar or control panel.
- Your Android device should now stop casting to the TV. If the TV screen is still displaying your Android device’s screen, you may need to disconnect the casting session from the TV itself.
Note: The steps to stop casting may vary slightly depending on the app that you are casting from. Additionally, some TVs may have specific settings or configurations that need to be adjusted to disconnect the casting session. If you are having trouble stopping the casting session, refer to your TV’s user manual for more information.
Troubleshooting Tips for Connecting Your Android Phone to Your TV
Connecting your Android phone to your TV can sometimes be tricky. If you’re experiencing issues, try these troubleshooting tips:
- Check Compatibility: Make sure your Android device, TV, and cables or adapters are compatible with the connection method you’re using. Refer to the device manuals or specifications to ensure compatibility.
- Check Wi-Fi Network: If you’re using a wireless connection method, ensure your Android device and TV are connected to the same Wi-Fi network. If they are not, connect them to the same network before attempting to connect again.
- Update Devices and Apps: Ensure your Android device, TV, and related apps are updated to the latest versions. Old versions can cause compatibility issues and may not be compatible with the latest technology.
- Restart Devices: Sometimes, restarting your Android device and TV can solve connection issues. Turn off both devices and wait a few seconds before turning them back on again.
Video Instruction
Conclusion
Connecting your Android phone to your TV can be a convenient way to enjoy your favorite media files on a larger display. However, if you experience issues, try these troubleshooting tips to resolve them. Check compatibility, ensure your devices are connected to the same Wi-Fi network, update your devices and apps, and restart your devices.
With these tips, you should be able to connect your Android phone to your TV and enjoy your media files hassle-free.
FAQ
Q: What is mirroring?
A: Mirroring is the process of displaying your smartphone’s screen on a larger display, such as a TV.
Q: What do I need to mirror my Android to a TV?
A: You’ll need an Android smartphone and a TV with a compatible connection method, such as HDMI, Miracast, Chromecast, or AirPlay. You may also need additional hardware, such as an adapter or set-top box.
Q: How do I connect my Android to a TV via HDMI?
A: Connect one end of an HDMI cable to your phone and the other end to your TV’s HDMI port. Change the input on your TV to the HDMI port used for the connection.
Q: How do I connect my Android to a TV via Miracast?
A: Turn on Miracast on your TV and smartphone, and select the TV from the list of available devices on your smartphone.
Q: How do I connect my Android to a TV via Chromecast?
A: Connect a Chromecast set-top box to your TV’s HDMI port, connect both devices to the same Wi-Fi network, and use a compatible app to stream content from your smartphone to the TV.
Q: What are some compatible apps for mirroring my Android to a TV?
A: Compatible apps depend on the connection method used. For HDMI, any app that supports video output via HDMI will work. For Miracast, any app that supports screen mirroring will work. For Chromecast, use apps that support Chromecast, such as YouTube, Netflix, or Google Photos. For AirPlay, use apps that support AirPlay, such as Apple TV+ or Apple Music.
Q: How do I troubleshoot issues with mirroring my Android to a TV?
A: Check compatibility, ensure your devices are connected to the same Wi-Fi network, update your devices and apps, and restart your devices. If you’re still experiencing issues, refer to the device manuals or contact customer support for further assistance.
Q: Can I mirror my Android to a TV without wires?
A: Yes, wireless connection methods such as Miracast, Chromecast allow you to mirror your Android to a TV without wires.
Q: Do I need an internet connection to mirror my Android to a TV?
A: For wired connections such as HDMI, no internet connection is required. For wireless connections such as Miracast, Chromecast, both devices need to be connected to the same Wi-Fi network.
Q: Are there any limitations to mirroring my Android to a TV?
A: Some limitations may include compatibility with certain devices and apps, lag or delays in the video or audio transmission, and limited resolution or quality depending on the connection method used. It’s important to check compatibility and consider the limitations of each method before attempting to mirror your Android to a TV.