There are many reasons why you might need to know how to record a phone conversation. Whatever the reason that led you to read this article, today we’re going to teach you simple methods to help you save your conversation with your partner.
Most often, people are interested in how to record a phone conversation on their Android device for the following reasons:
- To keep a business conversation on record so they don’t forget important details.
- To save the conversation with the person who violated their rights, so they can use the recording as proof of guilt.
However, no matter how good the reason is to record a conversation with your interlocutor, in most countries, this action is illegal. That’s why the latest versions of the Android operating system have lost support for the call recording function. Does this mean that it is impossible to record it? Not at all.
How to Record a Phone Call Using the Built-in Features of Your Smartphone
On the vast majority of devices running on older versions of the Android operating system, the function of recording a conversation is built-in. To use it when you make a call, follow these steps:
- Find the speaker icon in the call menu. Usually, to do this, you must enter the menu (by clicking on the icon with three dots), and then select the recording function.
- The created recording will be automatically saved in the program “Recorder”, and you can find it in the smartphone memory at the address “sdcard/PhoneRecord”. If you can’t find the recording this way, use the file search function. The name of the record will certainly contain the word “record”, which should be used for the search.
What to Do If Your Phone Has No Built-in Call Recording Feature
If the Phone app on your device does not support call recording, you can try to find third-party solutions. However, keep in mind that finding such software has become more difficult recently. In May of this year, Google announced that it would remove from the Play Store all apps that use the special features API that previously allowed you to record audio during calls.
It may seem that the last loophole has been closed, but ways to bypass the restrictions still exist.
The Top Best Call Recording Apps
Third-party applications can help you bypass the restrictions on recording conversations. Despite the fact that it is no longer possible to record conversations from the line as before, some developers have found a way. The trick is to “teach” applications to record a conversation from the external speaker of the device, rather than from the line, as it was implemented before.
In fact, all such software now works only in recorder mode, so when using it, do not forget: the louder your interlocutor speaks, the better he or she will be heard. To be on the safe side, you can switch to speakerphone mode, and then you will hear your interlocutor even better.
Call Master
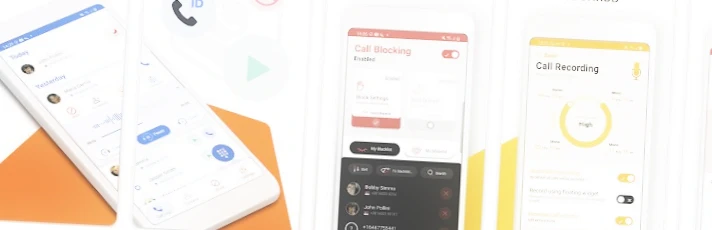
One of the decent solutions for recording calls is the Call Master app for Android users. Some of the key features include:
- Selecting the type of call recording: automatic or manual.
- Blacklist and filtering of calls with the built-in call blocker.
- Choice of ready files format (Wav, MP3), sound source (microphone, speakerphone, voice line) and quality (mono, stereo).
- Ability to record conversations made through Internet messengers such as WhatsApp, Telegram and Skype.
After installation, the application requires permission to use the microphone, manage the call list, as well as allow displaying over other windows.
When you make or receive a call, a special widget is displayed on top of the call window. If you disable the checkbox “Record with floating widget” and enable automatic recording of calls, you do not need to touch it because all other widget functions are pretty standard. You can add reminders, add the caller to the blacklist or whitelist, disable or enable the microphone, all the features that are in most modern callers by default.
If you open the application, you are greeted by a clear interface consisting of several screens. The first screen contains the call log, the second and third are dedicated to contacts and blacklist. The next screen is entirely dedicated to settings. In the “Record Calls” section, in addition to the automatic recording functions described above, you can also select the audio quality, format, and sound source.
Cube ACR (Another Call Recorder)
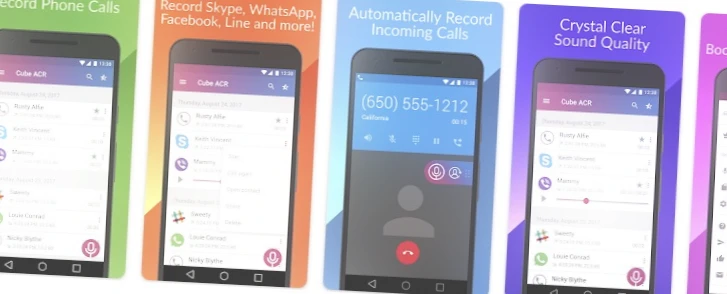
The next popular application designed to save mobile and VoIP calls in your smartphone memory is Cube ACR. It also supports call recording for most versions of Android phones and offers several options.
Main features:
- Automatic recording of conversations with selected interlocutors. In Cube ACR, you can create lists of callers, as well as exclusion lists for automatic recording.
- Built-in file manager to manage recordings.
- Favorite lists. Mark important conversations and filter them for quick access.
- Built-in contact list. You can make and manage calls in Cube Recorder without opening the application.
- Recorded conversations can be shared on all popular social networks.
- Possibility to choose the source of audio and also the format of ready files.
Backup to Google Drive and Dropbox cloud storage, the shake function, and some other features become available in the paid PRO version.
How to Save a Phone Call Using Gadgets
The easiest and most predictable way to save a phone call as an audio file is to use a second device with a built-in voice recorder. If your smartphone does not have a pre-installed function for call recording and you still need to save the conversation, you can use another smartphone or a smartwatch. When you call the person you want to talk to, simply activate the speakerphone and start the voice recorder on the watch or other device.
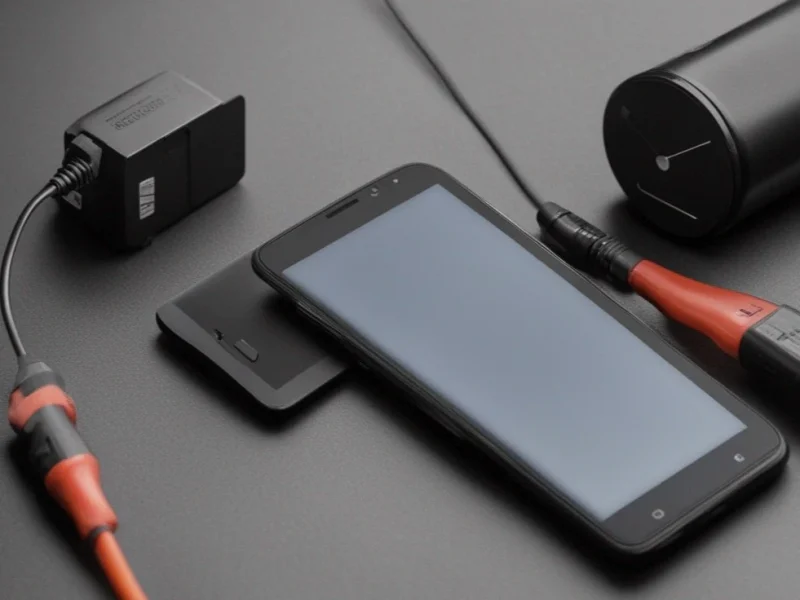
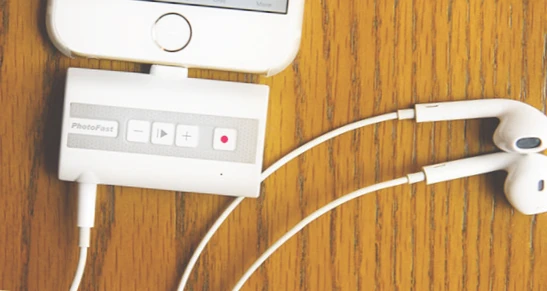
Alternatively, you could use more sophisticated gadgets, such as the Photofast Call Recorder, which is an external drive with built-in controls. This device can be connected directly to your smartphone via the charging jack, and it allows you to record both mobile and internet calls independently.
How to Record Conversations with the “Record Screen” Function
On smartphones running Android version 11, there is a new button called “Record screen” which allows you to record video from the smartphone screen at any time and in any mode. This feature can be used to record voice conversations as well. To do so, you simply need to activate the function before making or during the call.
It’s important to note that you should always have the “Record screen” button readily available to you.
To add the button to your toolbar, follow these steps:
- Swipe down twice from the top of the screen or swipe once with two fingers.
- Tap the “+” or “Add” button.
- Press and hold the “Record screen” button, then drag it from the available buttons panel to the toolbar and release it.
- Tap “OK” to confirm.
To record a conversation:
- Before making the call, swipe down and tap the “Record screen” button.
- Select the “Multimedia and Microphone” checkbox, then tap “Start Recording”. The video recording will start after a three-second countdown.
- Once you’re connected to the person on the phone, turn on the speakerphone.
- After the call ends, go to your file manager to view the recorded file.
Conclusion
Recording phone calls on Android can be a useful feature for many reasons, from capturing important conversations to simply keeping a record of your calls. With the help of the methods and apps outlined in our tutorial, you can easily start recording your phone calls on your Android device. However, it’s important to note that the legality of recording phone calls varies by country and state, so be sure to check the laws in your area before recording any calls. Always obtain consent from the other party before recording any phone call.